Ok, I finally found some time to get the project started. Better late than never! Not much to report, though. Just the usual tasks before real work can take place:
- create space on the workbench
- rake PET and breadboard up
- find documentation (if available at all)
- connect everything
- download/install/configure toolchain
- cupato (cheer up, pray and turn on)
- REPEAT pull_a_long_face UNTIL all_bugs_fixed == true
I was pressed for time (aka lazy) last RetroChallenge, so I failed to realize that it would have been a fantastic idea to clean not only the 6520 socket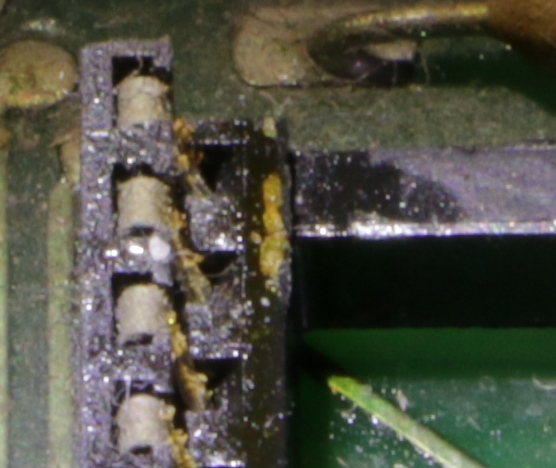 but every chip and socket on the contaminated PET mainboard. The PET refused to start the BASIC interpreter and soft-landed in TIM. Tough luck! Fortunately a retro computing nerd agreed to do the cleaning – grumpily…
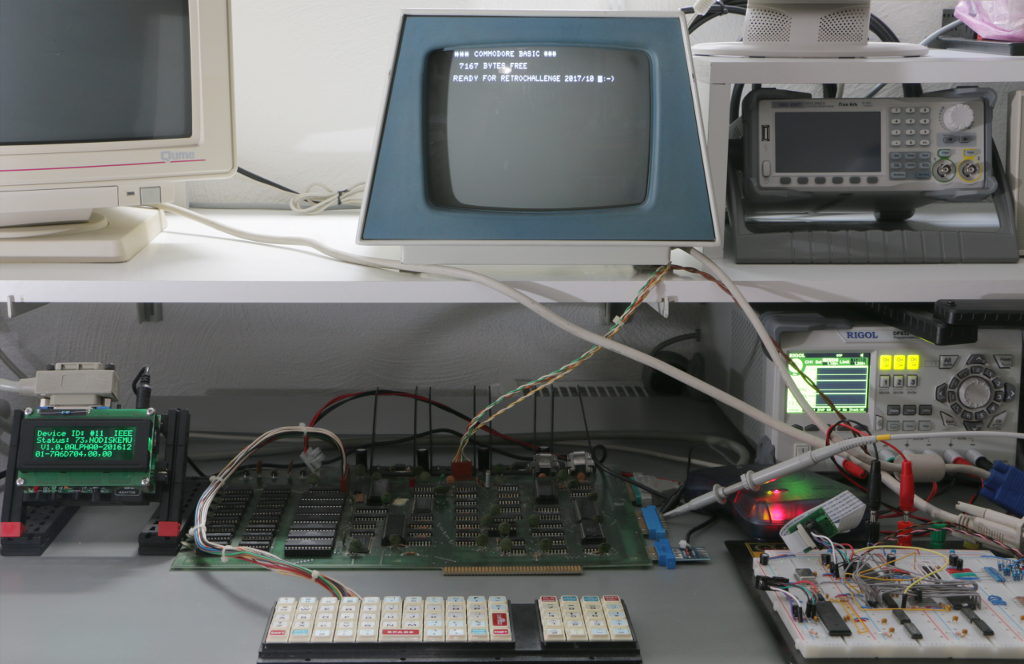
The PET seems to be ok now but the breadboard lives up to it’s name – not a single pixel is displayed on the VGA monitor. Monitor is ok when connected to a PC. Maybe the firmware version does not fit the last modifications of the circuit? To be honest, I probably missed to document the last steps as I hoped to continue the project on the next day. Apparently, it took about five month – and memory fades away…
In case you’re new to this project (or your memory is teasing you as mine does in this case), please consider (re)reading the archived blog entries of RC 2017/04 where I discussed some project basics. Otherwise it might be difficult to follow this ongoing development. Anyway, please feel free to put your questions into the comments. Moderated comments are used to prevent spamming, so it’ll take some time before your comment gets published.